Posts
Posts


The following article was written for new members of http://www.hobiefishing.com.au/ to offer guidance and inspiration to one and all. These are not rules of thumb as such, more of one persons approach to modification that relys on the eye of the beholder. Its an artform that can be taken too far or not far enough, one that suceeds to master the in bewteen will be better off fishing from the platform... Read on people:
Introduction:
Rigging a kayak is a very personal thing; in fact many people like to approach it like they would a new car. With numerous optional extras that can be fitted aftermarket, rigging your kayak is fun, healthy and strangely addictive. Some set up their kayaks with an intention in mind (Offshore work, estuary); some prefer the bare bones strategy of less is best, focussing on maximum deck space and minimum fuss.
There is even the all out approach that can involve the use of metres upon metres of PVC tubing, navigation lights and external fixtures. Whichever direction you choose, rest assured that form and functionality still have a place onboard, even when ‘Pimping’ or upgrading your craft to the max. I would like to share with you my rigging experiences from both sides of the spectrum, using my trusty 2006 Hobie Quest and my tandem kayak, the much loved 2006 Hobie Outfitter as conclusion tools.
2006 Hobie Quest specifications –
Length: 3.96m 13'0" Width: 0.72m 28.5" Hull Weight: 25.84 kg 57 lbs. Capacity: 158.76 kg 350 lbs.
The original Kayak was purchased brand new from a Hobie Dealer, this came with a rudder system, the dry bag, Hobie cooler bag and single rod holder. I purchased an additional 8" Hobie hatch, a Humminbird Piranha Max10 fishfinder, a 12v 3.3AH Sealed rechargeable battery, tube of black marine grade Sikaflex and some stainless steel self tapping screws to mount various odds and ends (All details and fittings listed below).
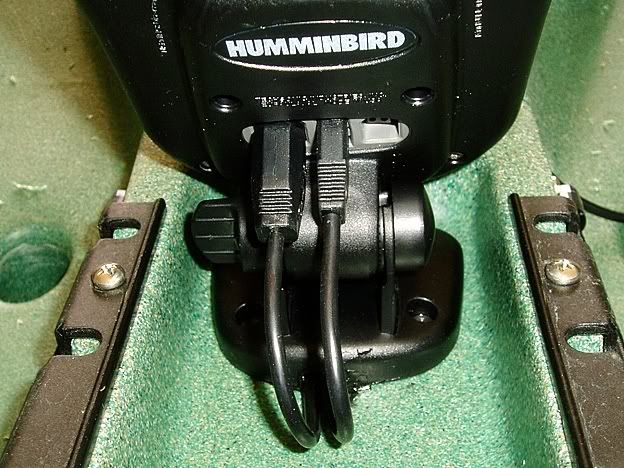
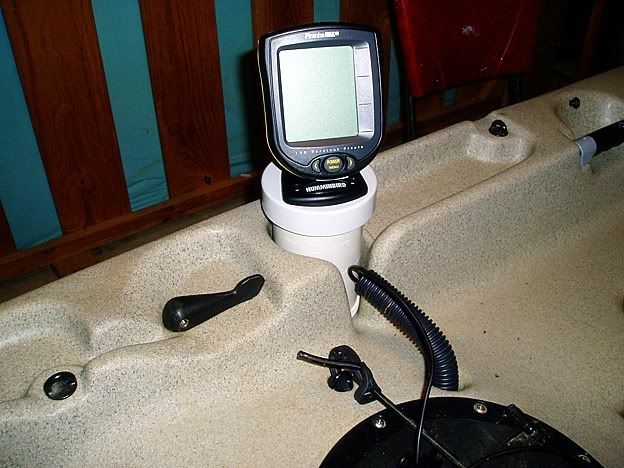
The Hobie Quest is a dream to rig but certain attention to detail must be sought, especially when it comes to additional forward rod holder placement and paddling stroke. Apart from mounting the Hobie / Scotty rod holder (Drilling a bare hull is slightly perplexing at first) The installation of the fishfinder was one of my first priorities, choosing a relatively cheap model sounder with a low pixel count that would still allow good depth sighting and general bed contours.
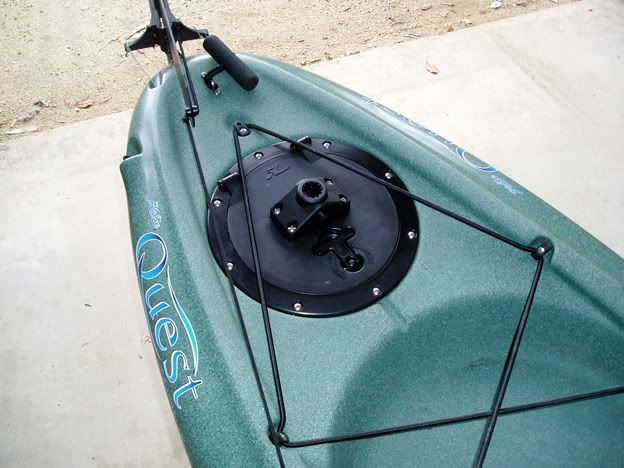
Sitting in the bare hull allowed for future movement theories once the rod holder mount was placed unattached, forward of the seated position. Paying attention to the Scotty inboard mark the mount was aligned for drilling, a soft gasket was included for use under the mount (Thus eliminating the use of Sikaflex or another bonding agent). After checking my paddle stroke, the area I researched for placement was marked and initial drill hole was made under the mount big enough to pass the transducer plug and battery plug through into the hull of the Quest.
Cords remaining above deck were adjusted to a suitable length required and a blot of Sikaflex was added to the base of the mount in the area that would channel the cords. The mount was then screwed into place permanently with the supplied self tapping screws that came with the Piranha Max10 unit. The final application of Sikaflex was applied under the mount where the cables protrude out, sealing it water tight for good.
Instructional Image - Hobie Quest Sounder Install DIY.
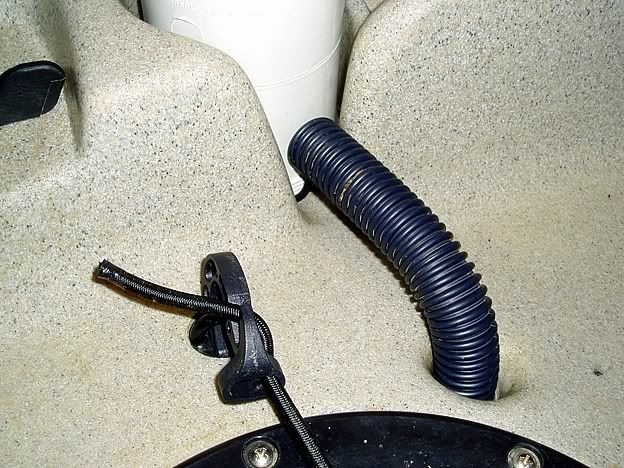
Instuctional Image - Hobie Quest Transducer Install DIY.
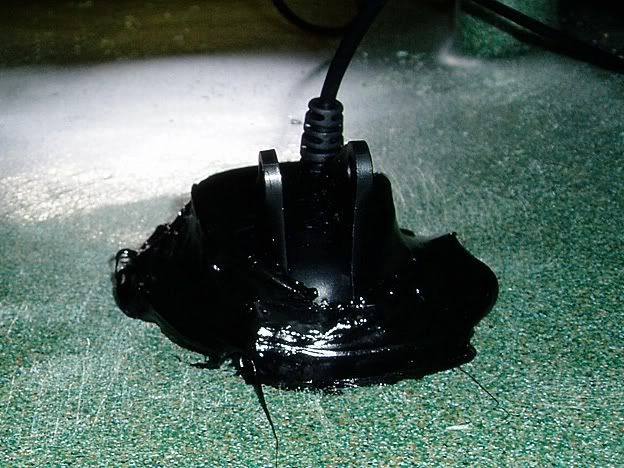
I decided to go with a hidden in hull transducer mount (Opposed to an external deck mount), located slightly forward of the middle 8” hatch and almost below the mount. Starting by sanding the hull with some course sandpaper, I then began sanding the bottom of the transducer lightly with some lighter grade paper. After aligning the transducer so it was straight and facing the right direction, a thick squirt of Sikaflex was added on the bottom of the transducer and then firmly but carefully placed onto the hull (Making sure to avoid bubbling whilst bedding).
Then I applied a decent amount of Sikaflex around the sides, front and rear of the transducer all whilst maintaining a mess free environment (Please note: other brands of sealant can work just as well). Remaining transducer cord was coiled internally around a scupper mast, with any adjustment of cable placement to be determined after Sikaflex had dried (Please note: recommended drying time – minimum 5 days). With the transducer located between both scupper masts a cut pool noodle wedges in front to stop any damage from larger objects placed in the hull for transport (This can include big fish!).
A small, snap lock Tupperware style container houses my battery and whilst not fully waterproof, handles the job well without promoting corrosion or energy loss. To keep this stable and in place some Velcro strips were first glued onto the bottom of the container, and then adhered into the hull using industrial strength plastic glue.
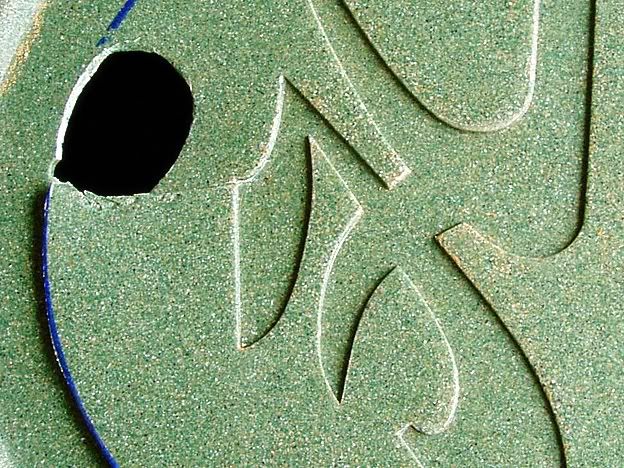
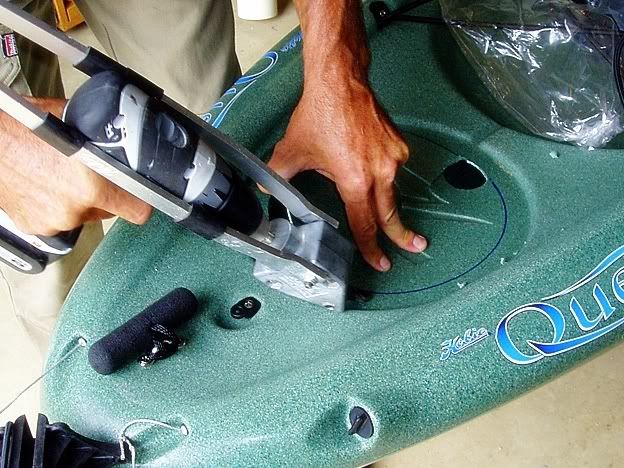
Installing the hatch proved easier than I first thought, the internal ring of the hatch was drawn onto area of placement (Rear Hobie logo encased in circular recess) on the top of the kayak. First a decent hole was drilled allowing some electric tinsnips to easily cut the circumference of the circle whilst following the area marked (Handheld tinsnips / Jigsaw blade would also work).
Instructional Image - Hobie Quest 8" Hatch Install DIY.
Instructional Image - Hobie Quest 8" Hatch Install DIY.
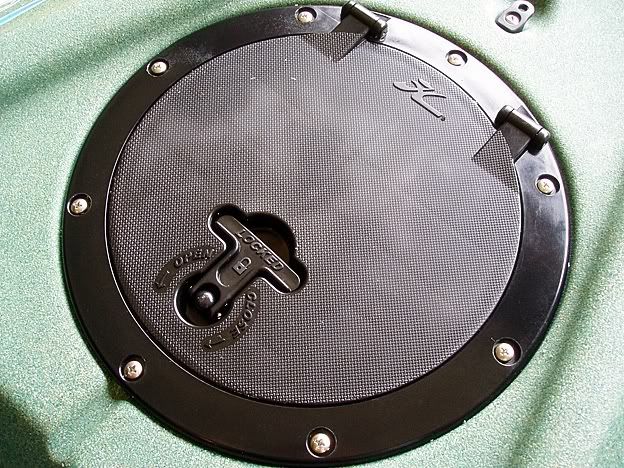
After some small filling of edges the hatch fell into place perfectly, internal ring was placed right way up inside the kayak while the hatch gasket and twist and stow cover were aligned and carefully drilled into place using marine grade stainless steel bolts. Extra self tapping 316 stainless steel screws were bought from my local chandlery store (Hobie hatch comes with 2 screws only). No Sikaflex was applied to any part of the hatch during installation due to the gasket bonding with a tight seal on the deck
A Ram mount for my GPS was purchased and bolted on behind the fishfinder on the slanted section at the end of the moulded tackle tray (Again with 316 marine grade stainless steel bolts). Because I sit above eye level these seem to line up without getting in the way of each other (Allowing my line of sight on the GPS to be perfect). A small amount of Sikaflex was placed around the bolt holes to stop any water ingress; I still had some Sikaflex left over and a few more jobs in mind.
I added another universal raised mount for my Scotty Marine Light on top of the rear hatch, mounted with 316 grade stainless steel bolts and Sikaflex for a tight finish. This still allows full use of the hatch in conjunction with the waterproof light but only opens about 90% due to clearance (Small dry bag stash spot or perhaps something not needed on an hourly basis).
Also procured a 1.5l camelback hydration system and mounted it onto the Quest seat by tightening buckles and threading on through arms of seat system. The older Quest seats have nothing behind or attached to them, so my paddling posture is still forward and correct. I always have the forward seat straps pulled as far as possible to force myself to sit up while paddling so this creates a small amount of room behind the seat.
Instructional Image - Hobie Quest 8" Hatch Install DIY.
Instructional Image - Hobie Quest Scotty Mount / Sea Light Install DIY.
To finish the kayak for its intended multi rod purpose, a Scotty Triple Mount rod system (Scotty No. 257) was purchased to replace the single mounted method, along with a Hobie Rod Holder extension (For use in the right rear moulded in rod holder). Already owning two Hobie rod spinning holders (Scotty No. 280) left a gap in the middle of the bar, an additional Fly rod holder (Scotty No. 265) was acquired for use.
The last remaining item still needed to be installed is a Hobie Anchor Trolley Kit, however as I wont be venturing offshore till the coming winter Snapper season I have purchased and put this off. The Anchor Trolley will allow the deployment of a drogue or chute to slow drift rates, albeit in a safer manner than just tethering. I still use a 1.5kg folding grapnel anchor in safe waters without a trolley when needed but this is mainly used in fine weather conditions and retrieved when swells are greater than 2m.
For shallow water scenarios the drift chute can be safely attached to the kayak using a Clam cleat but an avenue I find better is to use a Hobie Stake out Pole (Pegged through the Quest’s front Scupper holes). This is an exceptional tool that prides itself on working flawlessly with the Anchor Trolley Kit, allowing placement forward or aft of the seated position (Dependant on tide, wind and general weather).
Recently I purchased a Hobie Live Well for use in the current ABT Hobie Kayak Tournaments, installing on the back of the Quest to meet tournament requirements. I was pleasantly surprised with a personal report from Steve Fields saying that the battery testing conducted at the Huskisson factory lasted 13hrs of continuous running. The Attwood pump self primes with forward movement and comes complete with everything needed to run smoothly.
Its 25l capacity is more than enough to keep two big Bream alive, which was evident and indicative of Wayne Robinsons’ winning bag at the inaugural Sydney event. Coming complete with three built in rod holders this completes my Quest’s bid as a serious competition fishing machine, I now have the ability to carry up to eight multiple rods at any one time (Subject to state laws).
Hobie Outfitter specifications –
Length: 3.86m 12'8" Width: 0.86m 34" Hull Weight: 32.66kg 72 lbs. Capacity: 204 kg 450 lbs.
Before I became confident drilling into polyethylene everything I added to my Hobie Outfitter was external. From straight off the showroom shelf it came with everything one could dream of for fishing, sans fishing rods and tackle plus the diverse odd couple. After covering ‘Pimping’ aspects of Kayak rigging this is a good example of what can be achieved from an upgrade point of view.
A few simple, cost effective purchases can improve the comfort of your ride whilst enjoying its built in features. At first this Kayak housed everything but the kitchen sink, now I just enjoy simply setting it up stock standard for ease of use (With the following upgrades) and sharing the experience of Kayak Fishing with family and friends on a basic level.
After weeks of learning how to use my Outfitter to its full potential (Including solo use) I finally decided on what was needed, a removable fishfinder, a set of Turbo fins for the rear and a large sailing rudder. Fitting the larger rudder is more of an upgrade than anything else, undoing the nylock nuts and bolting on a new one required little more than a couple of minutes. Rather than opting for a double set of Turbo fins monies negated a singular purchase which improved speed by a few kmph and thus effectively quickened the turning circle.
The instructions for install are pretty straight forward but please be warned; this upgrade increases rapid momentum and ultimately excess pressure. Older versions of Mirage drives (Eliminated on 2009 V2) fitted with Turbo fins can fail under extreme strain in certain situations so use lightly, sparingly and correctly to decrease any susceptible sprocket damage.
Instructional Image - Hobie Outfitter Removable Fishfinder Install DIY.
Instructional Image - Hobie Outfitter Removable Fishfinder Install DIY.
My removable fishfinder mount was created for my initial need for water temp readings, but refined for depth allowing a detachable system mounted on the kayak externally that can be removed and included on the kayak before launching. This method has been tailored to my Hobie Outfitter and could easily be modified to fit any other yak on the market with scuppers and drink holders.
The unit where the fishfinder head (In this case another Piranha max10) is mounted needed to be portable, sturdy and rigid enough while retaining maximum stability. It consists of 2 x modular 90mm PVC screw ends with a small section of 90mm PVC to allow the ends to flush mount into each other. A 90mm PVC screw on cap is used for the top with a 100mm push on lid placed firmly on top to form a serious bind (Also used to house any remaining transducer cord and the 8 x AA 2500ah rechargeable battery box).
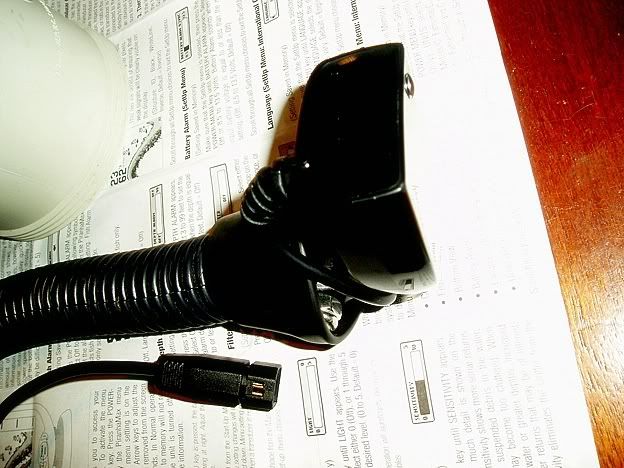
The transducer is mounted on some stiff but flexible hose style plastic tubing (think ribbed grey water pipe) with a solid bolt, covered by a modified Hobie scupper plug reversed to protect the hull from the boot. This manages to stay neatly attached inside the scupper hole with remaining transom cord housed within the PVC, coiled enough to provide a custom and stretch free environment.
To install simply feed transducer cord (Coiled up skinny enough to pass through the scupper hole using a bundled effect) and plastic pipe through from underneath the yak onto the deck and in through the PVC system. Thread both the battery and transducer plugs from the bottom of the PVC tower up and out through the grommet to the head unit, then place securely in the drink holder (The above dimensions offer a perfect fit on an Outfitter).
Instructional Image - Hobie Outfitter Removable Transducer Install DIY.
Instructional Image - Hobie Outfitter Removable Transducer Install DIY.
This is a very neat design that is fairly east to install for use on the water, just place the kayak safely on its side at the waters edge and follow the instructions above. Like all things external the only fret would be scraping or flexing the actual transducer boot upon launching or landing (Simply being aware can avoid this). Most of the hardware used to construct this was purchased at a Bunning’s store, rechargeable batteries, battery housing, electrical tape and snap attachments from Dick Smith.
After initial testing the transducer cord loop was extended to twice its size, mainly due to stiffness and pack ability inside the modular mount (Small cable ties hold in position). I find myself leaving the fishfinder system behind these days, using polarised sunglasses and the touch and feel of the Mirage Drive to gauge depth. The Kayak is now pulled straight off the roof racks and ready to go, no mess or additional fuss.
One of the more special, unknown features on the Outfitter was exposed to me through Rob Paxevanos and his informative TV show, ‘Fishing Australia’. With double the amount of drives onboard, one set of Mirage Drives can be placed in a backwards configuration. In calm water situations this will allow one user to propel forward while the other user can slow a drift rate or reverse away from snags, ultimately getting you closer to the action and within casting distance of shy, shutdown fish.
Conclusion:
I hope from reading this article you can determine how important it is to be comfortable in your Kayaks surroundings and your ability first before fully rigging your ride. Learning how your kayak handles is as important as finding its limits safely, excelling in some areas may give you better ideas on what you want out of your yak. Many other aftermarket options have not been mentioned as they are not applicable to my fishing techniques; however they may (And can always) be implemented in future years to come.